How to create your first React Project
Author: Nitish Kumar Verma

Prerequisite to create a react project.
1. Install node on you system.
Go to node's official site and download the correct version of node according to you system.
2. Install the VS code.
Refer the vs code documentation to install vs code on your system.
How to create react react project ??
Open your vs code and execute the below commands
npx create-react-app tic-tac-toe
cd tic-tac-toe


command explanation:
first command:
npx : is a package runner tool that helps in creating our react application.
create-react-app : It is the command that is used to create your project folders.
followed by it is the name of you project.
second command:
cd tic-tac-toe: This command is used to change directory to you project directory.
Before we get started let us answer few important questions.
What is react?
- It is a front-end JavaScript library developed by Facebook in 2011.
- It follows the component based approach which helps in building reusable UI components.
- Separate concerns(components) instead of separating the UI and logic.
What are some of the benefits of using react?
- It increases the application’s performance
- It can be conveniently used on the client as well as server side
- Because of JSX, code’s readability increases
- React is easy to integrate with other frameworks like Meteor, Angular, etc
- Using React, writing UI test cases become extremely easy
Lets Write our First React Code
HTML File
index.html
<!DOCTYPE html>
<html lang="en">
  <head>
    <meta charset="utf-8" />
    <meta name="viewport" content="width=device-width, initial-scale=1" />
    <meta name="theme-color" content="#000000" />
    <meta
      name="description"
      content="Web site created using create-react-app"
    />
    <title>Tic Tac Toe</title>
  </head>
  <body>
    <div id="root"></div>

  </body>
</html>
As far as html file is concern it is having only a single div tag with the id root. All the components will be rendered in this tag only.
The next important file is index.js
JavaScript File
index.js
import React from 'react';
import ReactDOM from 'react-dom/client';
import './index.css';
import App from './App';
import reportWebVitals from './reportWebVitals';

const root = ReactDOM.createRoot(document.getElementById('root'));
root.render(
  <React.StrictMode>
    <App />
  </React.StrictMode>
);
In the index.js file we are first Create a React root for the supplied container and return the root. The root is then used to render a React element into the DOM with render function.
<App/> here is jsx which stands for javaScript xml. This is a type of file used by React which utilizes the expressiveness of JavaScript along with HTML like template syntax. This makes the HTML file really easy to understand. This file makes applications robust and boosts its performance.
Lets understand more about the app.js file.
App.js
import './App.css';

function App() {
  return (
    <div>
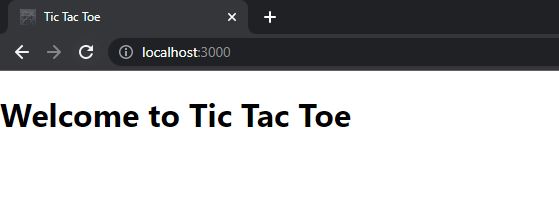
      <h1 className='app app-header'>Welcome to Tic Tac Toe </h1>
      </div>
  );
}

export default App;
In the app.js file we have function named App (which is a stateless component). In this file we are using the power of jsx and combining the JavaScript and html together for easy understanding. In last we are export the App so whenever <App/> is used it will be executed.
Let's See the output
In the terminal execute the below command
npm start
The development build will start and you will be able to see the output in you default browser.